DevLog_01: Week 7
This section covers the progress of modelling in the project thus far.
This week's modelling resources were spent making a Hazmat Humanoid, Slime enemies, and some basic scene assets.
To start, we envisioned our protagonist as a slime creature inhabiting a hazmat suit. Since its not an exact human, and rather a mimic, it's movements might be a bit wobbly and stretchy to incorporate the slime. To begin modelling, I started researching some reference images to begin blocking out the model. Reference images used are below.

Reference images found at (https://www.artstation.com/artwork/NGDNxJ)
With these reference images, i began to create the basic shape of what our protagonist might look like. Making the model form a "T-pose" so that rigging and animating would be a lot easier to implement. As a team, we also wanted to go along a "low-poly" art style, which often means having very blocky models, and a simple colour sheme. The are no direct textures in this art style however editing the colour textures to become more shiny or gritty may b something we consider later. Below is a early screenshot of the model after modelling and having added our colour scheme.
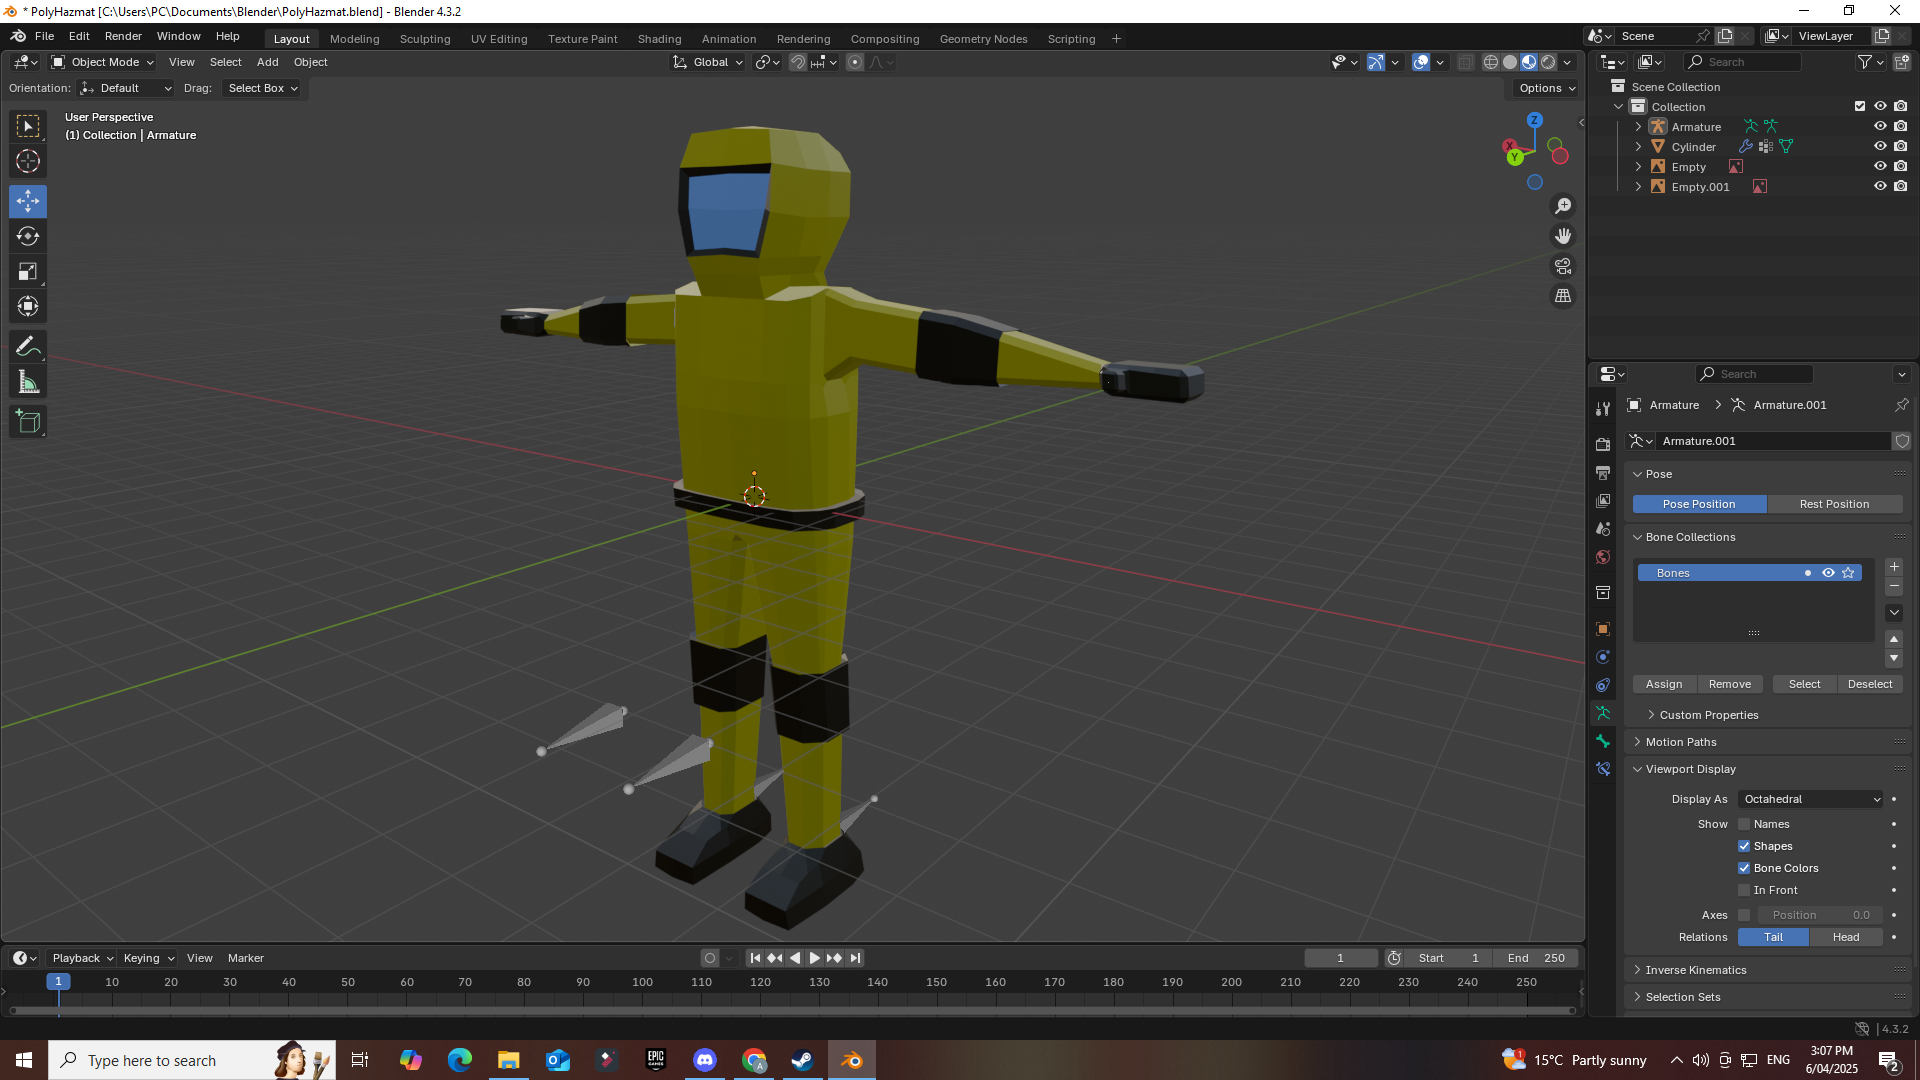
Then came rigging the model. Following along this tutorial video below, i set up a basic rig function with inverse kinematics for the legs.
The Gif below is a recording of the finished rig being lifted up and down, to demonstrate the leg functions.
After rigging, I followed the same tutorial for rigging to make some basic animations which are a "walk", "idle" and "run". These animations are in the project currently, however I will need to revisit this model to make some basic attacks in the future. Below is a walk cycle of the hazmat's "Walk" animation.
Next was to make some slimes! The team needed a basic enemy for testing, so i began to work on a slime enemy. As a reference, i used a picture of a puddle slime from the game Slime Rancher (https://store.steampowered.com/app/433340/Slime_Rancher/) to create a reference. Picture used is shown below, along with the finished model.

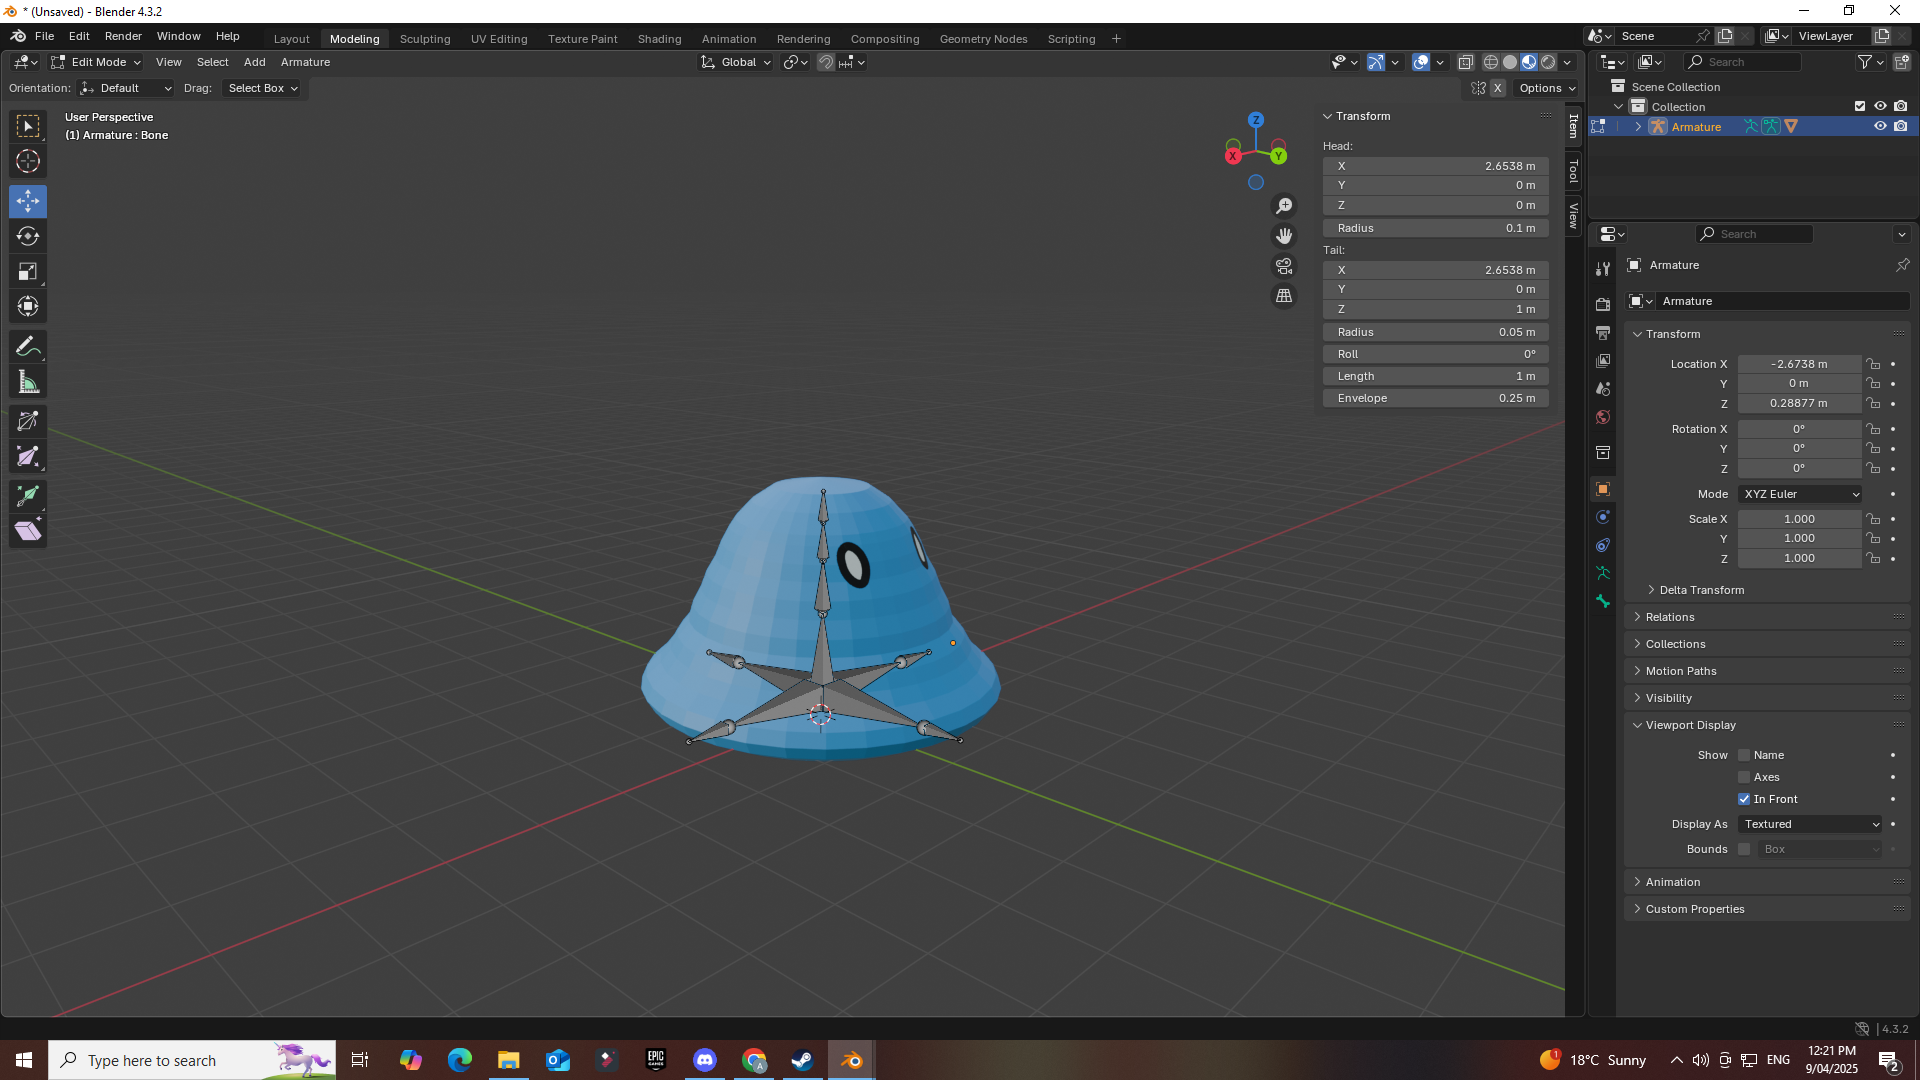
At first i figured rigging a thing with no direct bone structure might turn out harder than i thought, but after experimenting around i found having a spine go from the base to the head, and then having de-tached "Spider Legs" at the base to keep the bottom grounded. This turned out well and opened doors for me to create wackier things that aren't exactly made of limbs. I then created a "Idle", "Walk" and "Attack" animation. I also duplicated the model and coloured them differently to create multiple coloured slimes. The gif below demonstrates the multiple slimes made using their "walk" animation.
As a final note, i created some scene assets for the team to use to block out levels in style. The list of assets made included:
- Vat
- Table
- Flask
- Science Themed Box
- Shelf
- Hazard Barrel (with the wrong colour but will fix when i make more assets)
UI Backend
All good games require some sort of feedback to let the player know how much health they have left, so I made a basic UI. I added a slider for health, sprint stamina, and a shield. The shield will be an optional upgrade later in the game, but it has been included in the UI for now to help with organising it.
Adjusting the health UI.
I also added a pause menu and game over menu. The pause menu pauses the game and allows you to adjust the volume, go back to the main menu, or just resume game.
Testing the menu
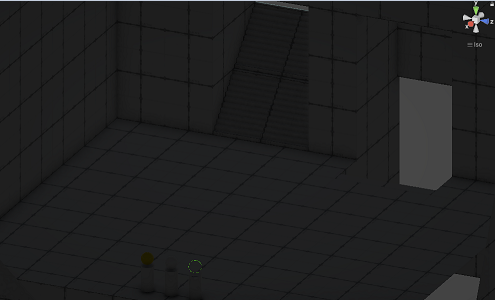
Lighting
The first level is an underground basement area where failed experiments are being kept. I wanted to create a dark feeling for that starting area and use lights to guide the player on where to go. I added a slight flicker to the lights for now, but we will have to tweak the values to add to the game feel without distracting the player.
Slime
We also decided that it’d be cool for the slimes to glow a little, so you can see them coming around a corner. We experimented with putting a light up the slimes butt, but it didn’t have the right effect, so I got to work on shaders.
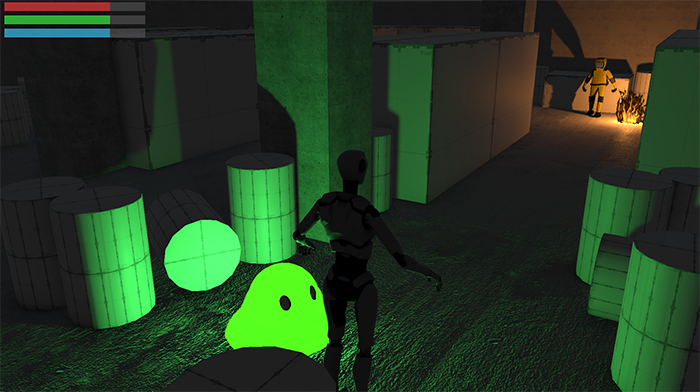
Image of original emissive slime. It's a bit bright, kinda cute though.
I made a shader to give a slight glow like effect around the edges of the slime using an emissive effect. Here’s a shader graph!
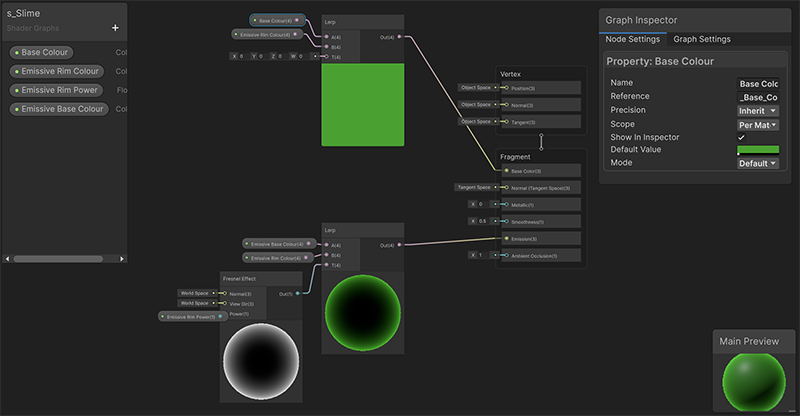
Image of shader graph used to make slimes glow around the edges
I also edited the slimes butt light to move around with the slimes animations and dimmed it slightly. Here is the result:
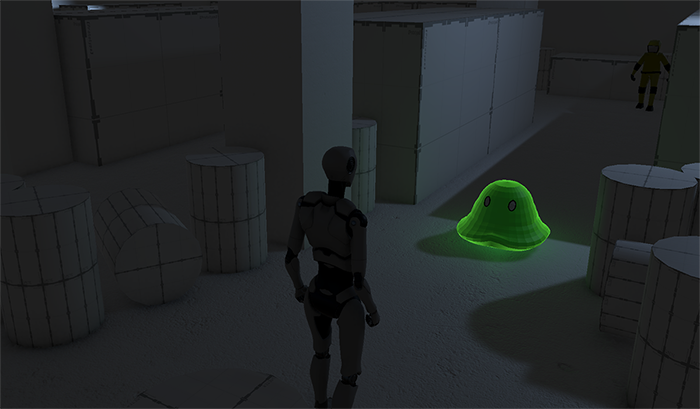
The new slime

Disco!
Next week for me: Setting the mood for first and second levels, Main Menu backend, effects on the player when they collect an upgrade.
Character Movement
In order for the player to interact with the game world they would need to be able to move their character. To accomplish this we used the official third person character controller, "Starter Assets - ThirdPerson", as a base. This character controller allowed us to get basic movement working in short order. However to support inputs for our game we needed update the input actions to align with our game, to accomplish this we updated the actions in unity's input system.

Enemy AI
With character movement dealt with we needed to deal with the enemy's movement and AI. To accomplish this goal we followed, a tutorial by a youtuber called "Dave / GameDevelopment". This tutorial allowed us to create an AI that had a sight range, and an attack range, allowing for three AI states Patrol, Chase, and Attack.
With this tutorial I made the AI script for our enemies.
Level Design
To design the levels for the slime floor a sketch was first put to paper to get a rough guide on how the ProBuilder model might be blocked. The do this blocking I followed a video guide by Thomas Brush, seen below.

Plane settings in ProBuilder
From here the plane was extruded to a larger sectioned cube. Here the height of the walls in the level will be 3 sections high so a 3x3 cube is made to start. This cube is then transformed by inverting the normal of the faces so that the level can be inside the cube.
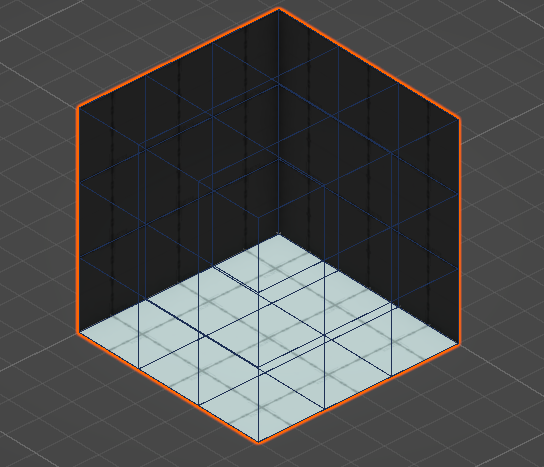
Inverted ProBuilder cube faces.
After getting the initial cube going it was time to design the level in Unity from the sketch and block it out with some ProBuilder objects.
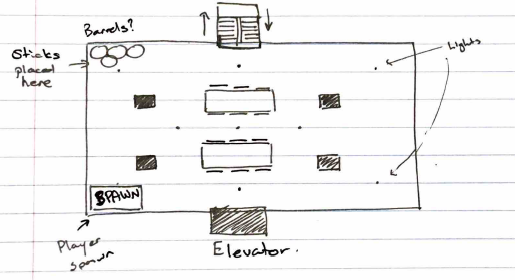
Tutorial level first sketch
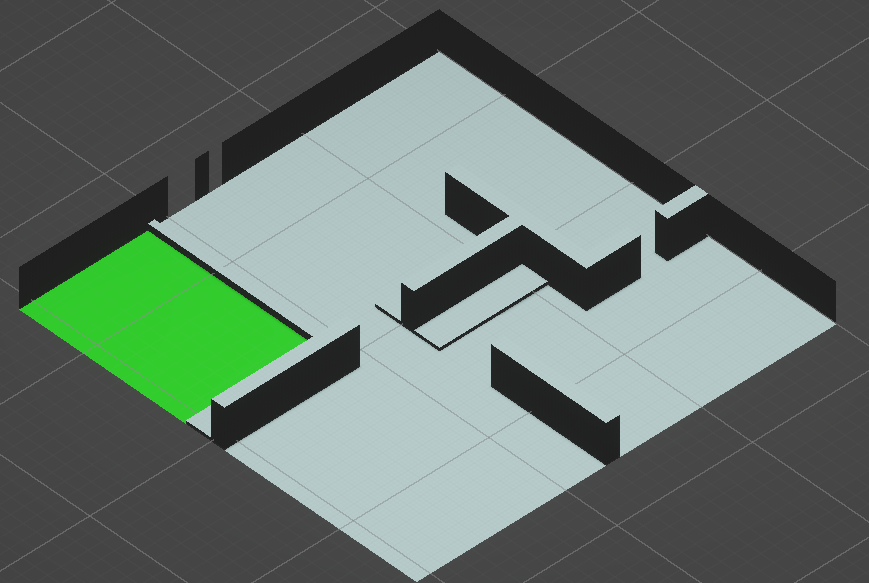
The level was then blocked out using the 3x3 cube into a bigger room by extrude the faces in the desired direction. Faces were deleted to make room for doors and openings. The blocking can be seen below.
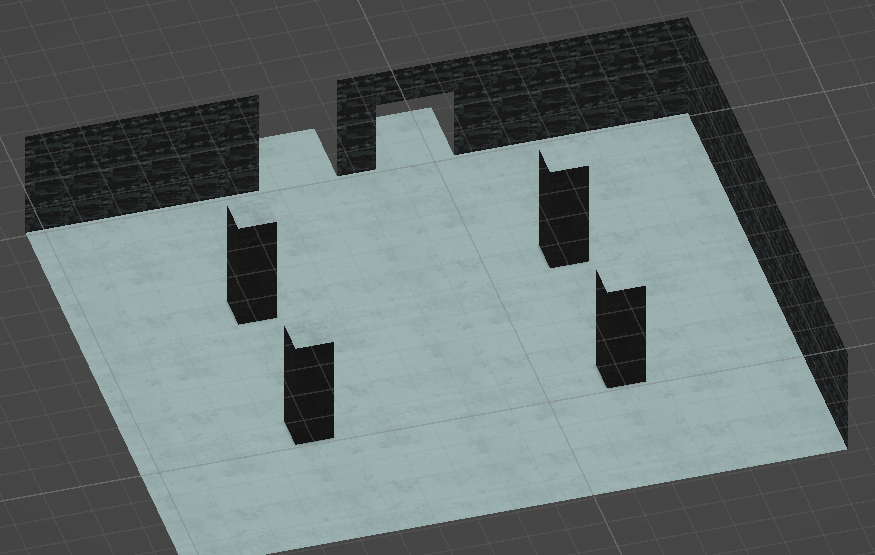
Tutorial level from 3x3 cube.
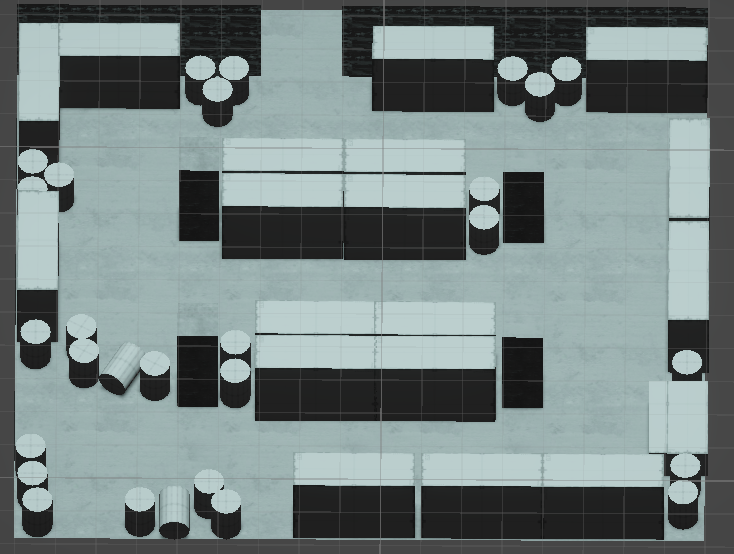
Some objects to mimic shelving/storage and barrels were added, and surfaces had some basic textures added.
After this a second level was built using the following sketch:
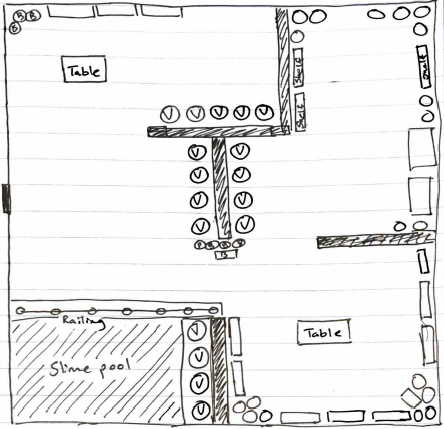
Sketch of second level idea.
The image above shows the starting idea of the second level. This level was then blocked out and had textures added.
Second level Unity model.
From here it was decided that instead of just climbing some stairs to get to the next level we should have an upgrade area as a loading zone to load into the next scene and also unload the previous scene. Intermediate upgrade area consists of three pillars where the player can pick one of the upgrades before moving onto the next level.
Upgrade Area, open area with 3 upgrade choices.
End
Thank you for reading our DevLog for week 7. See you next week for some more progress!
Leave a comment
Log in with itch.io to leave a comment.