DevLog_06: Lighting, Shaders, PostProcessing, & Cameras
Hi.
For this weeks work we started working with shaders, lighting, post-processing, and cameras. First I followed a Brackey's tutorial to learn how to make emissive materials (They make things glow). I put a combo of red and blue lights in the scene around Suzanne the monkey-head and lit up the scene. Also added a little bloom to make it pop. Getting Star Wars light saber vibes.

Figure 1: Monkey Under the Influence of Light
Shaders

Figure 2: Water Shader & Monkey Shader
Adding to the Game
I added the water into my game scene, and this time it did work in WebGL so you can see it working in the game! I had to make some minor tweeks so that increasing the size of the water let the waves and ripples stay the same size.
Next I needed to add some lighting to the level. Lighting in this bright tropical environment wouldn't pop particularly well, so it was time to make the sun set.
I added a couple spot lights around the building to appear more realistic, and then went to work creating torches to put around the island area. I also made sure to "bake" the lights to lighten the load on the system by adding the shadows to textures, rather than running real time shadows all the time. You can see the change below:

Figure 3: Before Lighting Changes.

Figure 4: After Lighting Changes.
I wanted to use the opportunity to combine lighting with my new shader skills, so I got to work making torches. I had already made a smoke particle effect, so just needed to make the flames. I followed a tutorial to get the jist of making flames, and Voilà, done.

Figure 5: The Flames
I also felt the need to apply the fire shader to the spawners so that the fish aren't just appearing into thin air. Now the fish spawn from fire.

Figure 6: Fish Spawning of Fire (sounds like an album name).
Cameras

Figure 7: The Dolly Cam

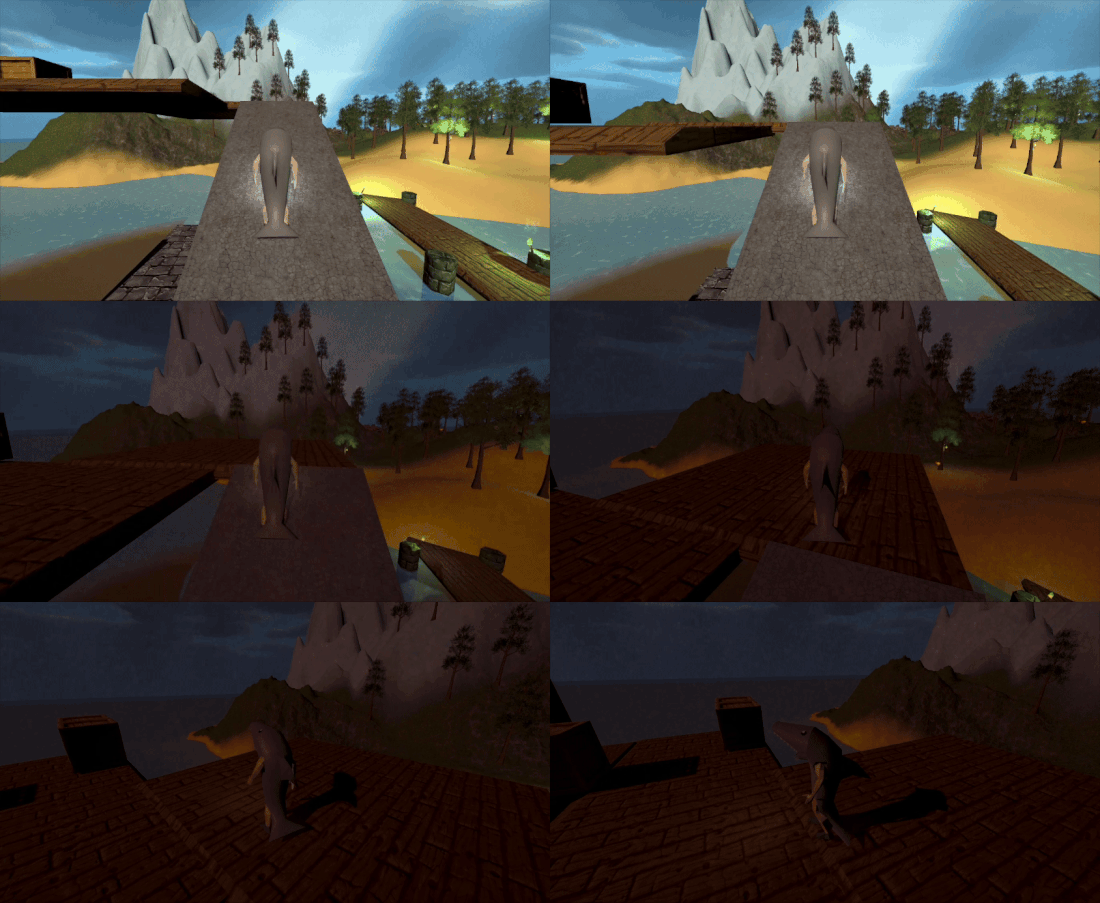
Figure 8 Switching between three camera types.
Post Processing
I experimented with some post processing (basically just camera effects) to see what changes I could make in the scene. I already had some bloom and vignette in the basic camera of the game, but I wanted to try out making one area look a bit more evil and dark. I darkened the scene with a post exposure value, but then also added a red tint and a strong film grain. It worked out pretty well. Looks like a blood moon rising effect from Zelda!

Figure 9: Post Processing Changes
For a bonus round I followed a Unity tutorial to make a custom post-processing shader, then I also added a group follow camera to the game to make this weird noir scene. The camera will aim to keep all these enemies and the player in frame at all times.

Figure 10: Custom Post Processing and group camera.
I'm always a fan of using different types of Cinemachine cameras some subtle post-processing in games, so it was fun to get a bit more experimental with effects I wouldn't normally use.
That's it for this DevLog! Thanks for reading. Next update will likely be mobile controls and compatibility, but that's a while down the road!
References
Realtime Lighting In Unity - Brackeys -
https://www.youtube.com/watch?v=wwm98VdzD8s
Basics of Shadergraph, Unity Tutorial - Brackeys -
https://www.youtube.com/watch?v=Ar9eIn4z6XE
Simple Cartoon Water in Unity - Brackeys -
https://www.youtube.com/watch?v=Vg0L9aCRWPE
Unity Shader Graph - Fire Flames Shader Tutorial - Gabriel Aguiar Prod. -
https://www.youtube.com/watch?v=glSsaRpHKos
Create a Low-Code Custom Post-Processing Effect in URP - Unity -
https://docs.unity3d.com/6000.2/Documentation/Manual/urp/post-processing/post-pr...
UTAS KIT207 Portfolio
| Status | Released |
| Category | Other |
| Author | Josh Daniels |
More posts
- DevLog_05: Game Ideas (Self Study)Mar 24, 2025
- DevLog_04: A Simple Game (Self Study)Mar 21, 2025
- DevLog_03: A Change Of Scenery (Self Study + Tutorial)Mar 17, 2025
- DevLog_02: A New Employee (Self Study + Tutorial)Mar 09, 2025
- DevLog_01: The Barrel and MONA ROMA-II (Self Study + Tutorial)Feb 26, 2025

Leave a comment
Log in with itch.io to leave a comment.